Top tips for taking wildlife photos in your garden

Top tips for taking wildlife photos in your garden

Matt Taylor

Reserves Officer Matt talks us through his top tips on photographing wildlife in your garden

Garden photography has advantages over visiting far-flung lands and trying to see exotic species. The first is just that, it isn’t a far-flung land with exotic species that takes days and large sums of money to reach. You often see the animals and plants that visit or inhabit your garden regularly, every day even. If you don’t quite get the image right first time, it doesn’t matter as you can simply nip back outside when you’ve got a spare moment. Contrast that with a Jaguar emerging onto a river bank in the Amazon, you’re unlikely to get a second chance!  Practicing your photography in the garden will set you in good stead for when you do find yourself presented with those once-in-a-lifetime opportunities. You also get to enjoy the British weather and eat ice creams in between photography sessions, a luxury you might not get in the depths of a jungle!

So now I have given you a few reasons to try garden photography, let me give you a few tips and ideas of what you can do in your garden.  This blog won’t go into in-depth information about specific techniques, there is plenty of books and online sources for you to research, but it will give you some pointers to get started.

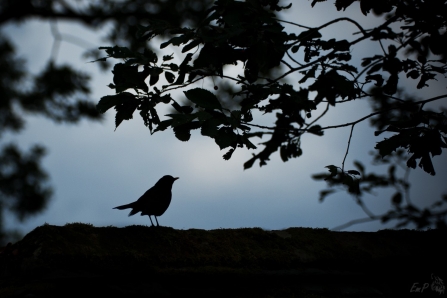
Blackbird

Matt Taylor

Birds

Most people will already have bird feeders set up in their garden.  If you haven’t, it’s easy to get some and put them somewhere photogenic.  Alternatively, you can find photogenic perches and stick them in the ground near your feeders, too.  If the feeders can be near to a window, conservatory, patio or a shed even, somewhere you can sit comfortably for a while, even better.  This will either prevent the birds from seeing you or allow them to acclimatise them to your presence.  Remember, try not to photograph through glass too much, open the window if you can as it will give your images better clarity. 

With birds, faster shutter speeds are usually best.  This can be achieved using a sports mode setting or by switching your camera to Aperture priority, selecting an f/stop of f/4, f/5.6 or f/6.3 and adjusting your ISO to 400 or 800 to start with.  Photographing birds on a perch, a shutter speed of around 1/500th second will be a good starting point.  For birds in flight, shutter speeds faster than 1/1000th second will be best.  Don’t be afraid to adjust your settings to try and achieve this.

Images of birds in flight will require fast shutter speeds.  If you’ve got Swallows, House Martins or Swifts, regularly visiting your garden or your house, have a go!  To get a different perspective, try photographing them from an upstairs window.

House sparrow

Matt Taylor

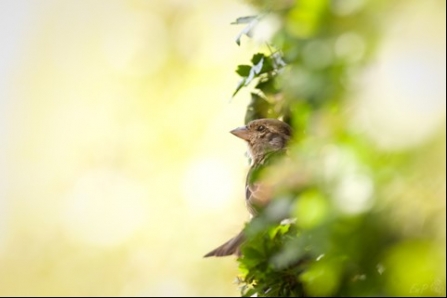
This female House Sparrow waits patiently in a hedge for her time to visit the feeder which is just to the left of the frame.

If you have a phone camera and are struggling to get close to the birds in your garden, why not attach your phone to a stick near a perch and set a time-lapse function running.  This will take a photo every few minutes for an hour or more.  Hopefully you will get birds landing on the perch just as your phone is taking a picture.  There is also a potential that your phone may become a perch and could get poo’d on… you’ve been warned!

You’ll soon learn that different bird species have different characters.  This opens up photographic opportunities for you to explore.  Don’t be a stickler for rules either, start changing your shutter speeds with birds in flight to get abstract imagery of wing movements, or to capture streaks of rain drops (or snow) whilst a bird is perched up.  Try lying down on the ground and photographing those ground feeding birds – the change in perspective can lead to some wonderful out of focus areas.  Play, experiment, the world is your oyster!

House sparrow

Matt Taylor

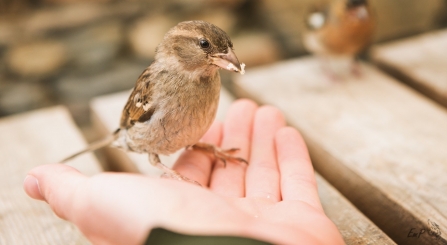
Garden birds can become quite tame providing great opportunities to explore new photographic ideas.  This House Sparrow was photographed with a wide angle lens but I could have used my phone whilst she sat on my hand!

Mammals

You’ve set up your bird feeders and got some photos of your new feathered visitors, but you want another challenge.  Mammals won’t disappoint in the “challenging to photograph” department.  You may find that mice and voles visit your garden now you’ve got bird feeders and this can give you a great chance to try and photograph these speedy guys!  The same applies to photographing flying birds, try using fast shutter speeds. 

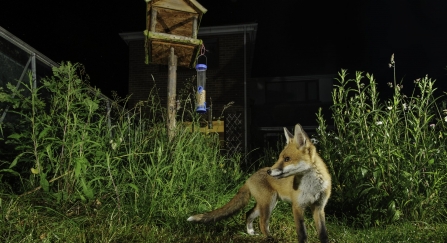
You may be lucky to have Deer, Fox or even Badger visiting your garden.  These are trickier to get photographs of as they can turn up early or late in the day and often pass straight through your garden.  Security lighting and some supplementary feed may help here or you can look into setting up camera traps to capture these animals on film. 

Ensure that these animals don’t associate you with food, however.  Whilst this may help get photos of them, it could lead them into conflict with people elsewhere.  Your aim to get photos shouldn’t put the animal at risk in anyway.

Red Fox

 Camera trap image. - Terry Whittaker/2020VISION

Close-up photography

It is very easy to get lost in a microscopic world once you start with close-up photography and it can be a very rewarding genre within photography.  From insects, plants and spiders, your garden will likely offer a wealth of subjects to work with! I will group photographing insects, spiders and plants together as it often involves fairly similar principles. 

Close up photography can be very technical and there are plenty of online resources for this kind of technique.  But it really doesn’t need to be complicated to start with. You are best trying to use a lens that can focus very close to subjects or use the close-up/macro function on your camera.  Quite a lot of phone cameras also focus up close, too, so you have no excuse!  You can also get adaptors for both camera and phone lenses so that you can get even closer.  Working with such a short distance from your subject means you will often need a small aperture (try using an f/stop of f/8 to start with) to get more in focus. The depth of field is very shallow. Close-up work also shows up camera movement easily, too.  If you have a tripod, it can be handy to use, but it isn’t essential. I often handhold my camera, you just have to watch your shutter speed and concentrate on being as steady as you can.

Bee

Matt Taylor

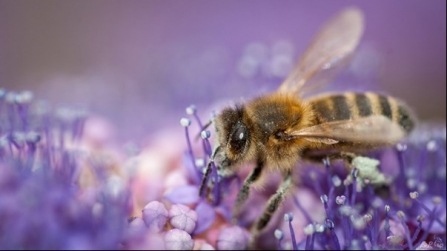
A bee collecting nectar amongst Hebe flowers.  For this image, I used a flash to ensure I had a fast enough shutter speed to freeze the buzzing bee’s movement.  Note the shallow depth of field here.

When photographing insects, try to keep your focus on the eye (or eyes) of the insect as the short depth of field can easily turn a photo from a winner to a failure very quickly!  When photographing flowers, I tend to try and maintain focus on the plants staemens or the stigma, whichever provides the most pleasing composition.  Also, experiment with colours and colour relationships with close-up work, it can make for very strong images.

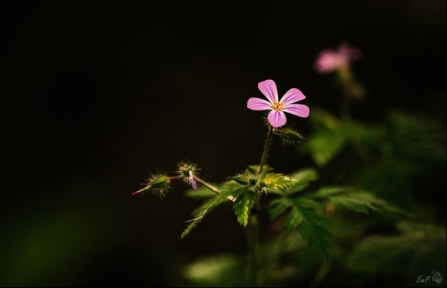
Herb Robert

Matt Taylor

Herb Robert photographed with a telephoto lens as I didn’t have a macro or a close-focusing lens handy.

Your turn!

I hope that this has provided you with some ideas for getting creative whilst photographing wildlife in your gardens. The only limit in photography is your imagination. Share your photos with us on social media, we’d love to see them!